Welcome to Cosmic Frontiers's Wiki!
Work in Progress
Please note that this documentation is currently heavily work-in-progress and therefore still missing a lot of content, may at times be severely outdated, or plain incorrect.
If you can't find what you're looking for, feel free to ask us on our Discord.
Installing the Pack or Migrating
Info
Due to there being many launchers, the best recommended Experience is Java 21 and Prism Launcher Version 9+. (1)
- This Assumes you have Prism Launcher Version 9.0+
As long as your launcher supports newer Java versions for MC versions that don't natively support it, you can ignore this. However, this guide will be a full setup install of PrismLauncher and Cosmic Frontiers
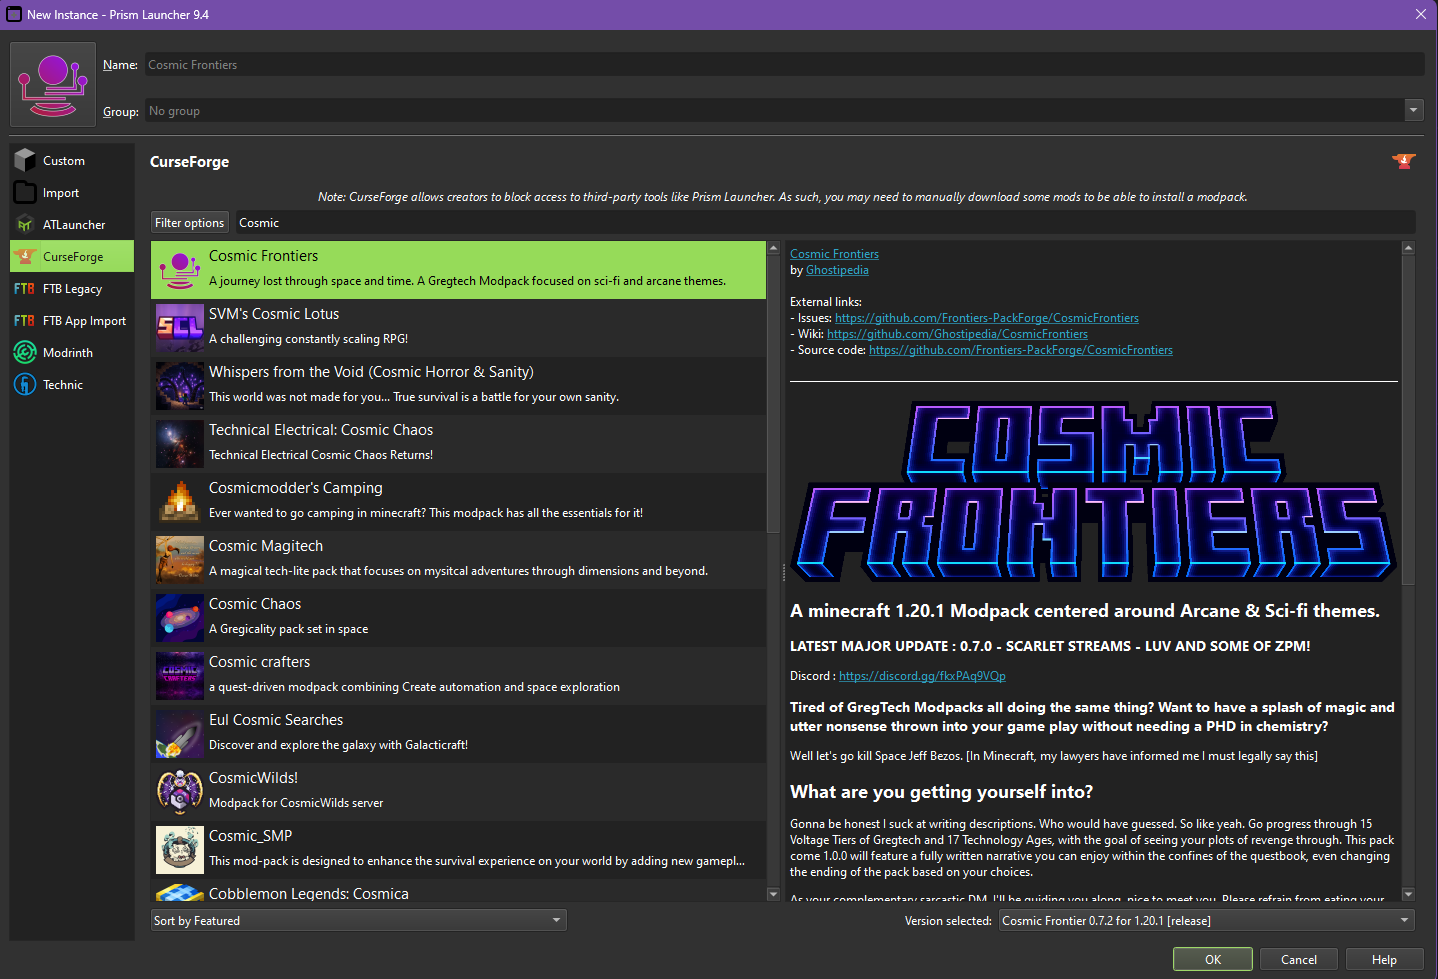
Installing the Pack
This guide opperates on using Prism Launcher.
If you haven't already, download the latest release for your computers build : Here
- After Installing the Launcher itself, Navigate to the
Add Instancebutton.

- From the left sidebar, click
Curseforgeand navigate to the bar which saysSearch and Filterand type inCosmic Frontiers - You should see the modpack listed, click on it once, then navigate to the bottom right of the window and click
OK, it will always install the latest official release.
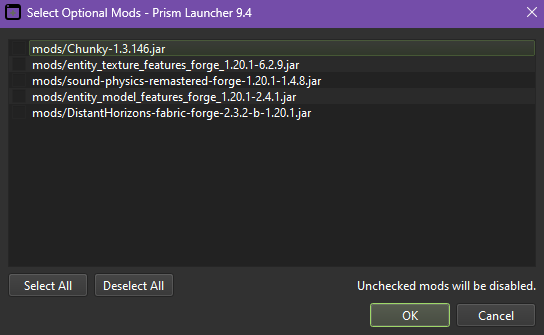
 3.5. You will be prompted with optional mods you wish to enable, these are generally more performance heavy so keep that in mind, Chunky is used for chunk pregen. The Rest are solely cosmetic or visual.
Navigate to where your instance was installed in the main window, right click your instance, and select edit

Tip
This Next Image Contains a lot! each step will be detailed below with a reasoning as to "WHY" we are doing this.

- Java Install: We want to set our Java to at least
Java 21. To do this, we need to manually override the Java version the instance uses. - If you haven't already, we're going to need to download a version of
Java 21for your system. Thankfully, Prism makes this easy.
2.5. IF YOU DO NOT SEE JAVA 21, uncheck therecommendedbox at the bottom, select your prefered flavor (I prefer Adoptium Java 21), and install! - Auto Detect: After installing Java 21, you can find it in the list of your available Java installs here.
- Skip Java Compatibility Checks: This may sound scary, but it's perfectly okay — Java 21 will work perfectly fine with Cosmic Frontiers.
- Java Arguments: Paste in
-XX:+UseZGC -XX:+ZGenerationaland click test. It should now pass!
So, what did we just do? We've done two separate things: we have enabled a more cutting-edge version of Java with a better garbage collector, which, in simple terms, clears out unused memory so it can be reused elsewhere. In short — generally better performance for mid-spec systems.
That should be everything, you're ready to play! Have fun and check out other parts of the wiki if you get lost!
Unfamiliar? Check out the Install Guide if you are lost!
The Easy Way
- Install the pack fresh, like usual.
- Open the .minecraft folder of your old pack and your new pack by right-clicking and selecting
Folder. - Copy your
savesandjourneymapfolders and place them into your new instance. (optional) 4. If you want your keybinds, copy and pasteoptions.txtinto theminecraftfolder. (optional) 5. If you want your EMI configuration, go intoconfigand copyemi.cssto your newconfigfolder in your instance. - Go into your save folder, open your save file, and find the folder called
serverConfig— delete it. This is required. Note: If you are technically savvy enough to understand why we do this, please continue to do so and cherry-pick any saved changes you may have made yourself.
The Hard Way
This generally riskier way of updating assumes you are a bit more skilled with file management.
- Install the pack fresh again.
- Open your new pack instance folder WITHOUT LAUNCHING.
- Go to your old instance, delete
config,defaultconfigs,kubejs, andmods(while saving anything relevant to you). - From your new instance that you did not launch, copy all four of the same folders you just deleted into your old instance.
- Go into your save folder, open your save file, and find the folder called
serverConfig— delete it. This is required.